I looked around for DIY instructions and found loads of people suggesting using CD cases, for example this one from engadget.com. There was a simple but not transportable autocue from creativepro.com and another simple but not transportable... which also could not allow the camera to be angled correctly for the shot from instructables.com.
Professional autocue units look like this and so that was roughly my target -- make something close to a professional unit for very little money! So... time to design and build my own and then share it here on the net for others to follow:
Having drawn out on paper a rough design based upon a lightweight wooden box with a angled glass running on rods [TV and film cameras seem to love rod based attachments!] The next stage was to get the bits and build it.
 I decided to use 4mm MDF for the wood box and use 10 mm square section wood as battens to join the MDF. First step was to cut the MDF and then draw out on the MDF the location of the battens.
Sorry the angle of this photo makes the side wall look really strange.
You will need at least some of the guide lines on both sides of the MDF to enable you to know where to put the panel pins in to hold the battens.
 I decided to glue and panel pin the 10mm battens in place. I used the clamp to stop the batten sliding all over the place when I turned over the MDF to tap in the panel pins.
The glue had this tendency to make the batten float everywhere and it was tricky to get the clamp to hold it in place.
 When all the battens are in place [there are 4 on each side wall] the side wall looks like this photo. Yes, I know I use too much glue!
Note the 'slot' is for the glass which is added at the final stage. The slot is wider that necessary for a pane of glass as I intend lining the inside with black velvet to reduce any internal reflections.
Professional autocue units use half silvered mirrors [actually 70:30 mirrors] but I cannot find where to get these cheaply so will try with normal glass and hence cutting down the the internal reflections is more important. That's also part of the reason for making it a full hood rather than just a top hood like the professional units.
 The other reason for making it a full hood is for ease of construction. The base for the unit is 4 30mm x 20mm battens connected with 4 right angle metal joints. I used the metal joints as a way of trying to make the base square. This is then secured to the side walls and creates a solid structure.
The monitor rests on three of the battens allowing access to the connectors on the bottom. The fourth batten is for to make it a stable structure and give something back and font to take the hood into the rod system.
The dimensions of the hood/monitor cradle were done to fit with one of the LCD screens from the office. This LCD screen has the added bonus that it runs off a 12 volt supply which means that we can even use this autocue on location!
 Here is the completed 'hood' with an 80mm hole cut in the rear panel to allow the camera to look through. 80mm is exactly right for our Canon XL1 with the lens hood removed.
Next step is to look at how to mount it on rods. I bought some 14mm aluminium tubes from the hardware store and found that I had a 13mm drill bit. Hmmm... I think I may change to a wood for this mark 1 version and make rods for the mark 2.
 The next step was to build the camera riser. This is to lift the camera off the wood 'rods' to make the lens come to the centre of the mirror. I wanted this sturdy and light and found some right angle metal joints and a flat plate at the local builders merchant/DIY centre. I pop riveted them together to make the riser.
This turned out to be approx 4mm too high so I planed down the 'rods' to make it the correct height for the camera.
I addes a second plate to the bottom of the rods as a way of fixing the tripod to the rods. I had to drill out a 1/4 inch hole in both plates and use an extra nut and bolt to secure tripod to rails and camera to riser.
 Here is the first camera on riser on rods on tripod test.
I found that I had not noticed that the camera body is offset from the lens so it didn't align properly. I needed to re-drill the mounting hole on the camera riser approx 2cm over to align it properly.
An extra nut was needed for the camera to ensure that the full length of the bolt wasn't used and potentially might damage the nut inside the camera body.
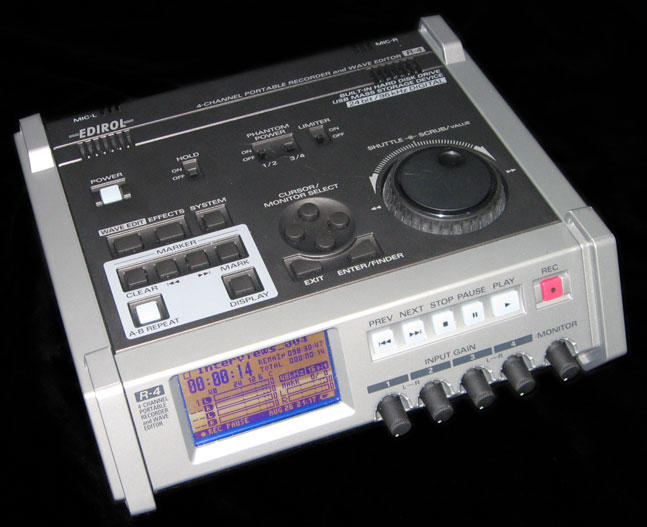
[If you are wondering what the extra box on the back of the camera is, it does the following: 1. Enable a quick release cable to work with the Edirol R-4, taking outputs and inputs from camera to recorder along a single multicore 2. Enable the Edirol and the remote zoom to share the LANC connector of the camera, while only sending power form the LANC to the zoom demand 3. Enable the cameraman to use headphones with a standard 1/4 inch jack plug rather than the 1/8 inch on the camera.]
 I decided to try matt black paint instead of velvet inside the hood as it would be very much easier than gluing velvet inside and I can add velvet at a later stage if I find I need it.
Having seen the effect on the inside of the hood I decided that a coat of matt black paint would make the whole autocue look better...
 Final steps, buy glass for the screen, and fit and test the LCD monitor.
Here is what it looks like in action. We have two red-heads on for lighting so this gives some impression of how clear it will be in a real-life situation.
I talked to the glass merchant about half-silvered mirrors. They don't have the 30:70 mirrors the professional units use, but they do have partially reflective glass used for the outside of buildings. I decided to try regular glass before buying the more expensive glass.
 The regular glass produces a double immage because the light from the monitor reflects on both the front and back surface of the glass, so I will get the glass merchant to try and get a piece of the glass for outside of buildings and try that.
Having said that, I found that the text was perfectly readable and the unit usable with the regular glass.
I also found that the matt black paint was not quite as matt as I would like allowing some internal relections. However again this didn't impact its use too greatly.
 I tested a number of programs for the prompting and eventually decided on Presentation Prompter. Current version is 4.2. It isn't perfect, but produced the smoothest scrolling of all the programs I tested. It costs $65, which is a reasonable price for the quality of the software.
OK, one last problem. How to control the autocue. The answer is Salling Clicker. Salling Clicker is a remote control program that allows your mobile phone to control your computer. It costs $23.95. Very good value for money. It will control Keynote as well, so I will use it for many things.
This means my Palm Treo 650 can become the remote control and just by rocking my thumb back and forth across the 5 way button I can control the speed of the autocue. But... of course there has to be a but... I had to write the AppleScript to make Salling Clicker do this! Salling Clicker uses AppleScript to do all of its remote control. Here's where to find the Salling Clicker script I wrote http://download.rsdt.org/Presentation-Prompter.html